After generating an SSL certificate using Really Simple Security (v5.0 and upwards), the SSL certificate needs to be installed on your server. This is usually done in a hosting control panel like Plesk (or cPanel).
Automatic installation
Really Simple Security can install the certificate automatically for you, if the Plesk API is available on your server. Really Simple Security will detect if this is the case and guides you through the required steps.
If automatic installation is not possible, you can install the new certificate manually.
Manual installation
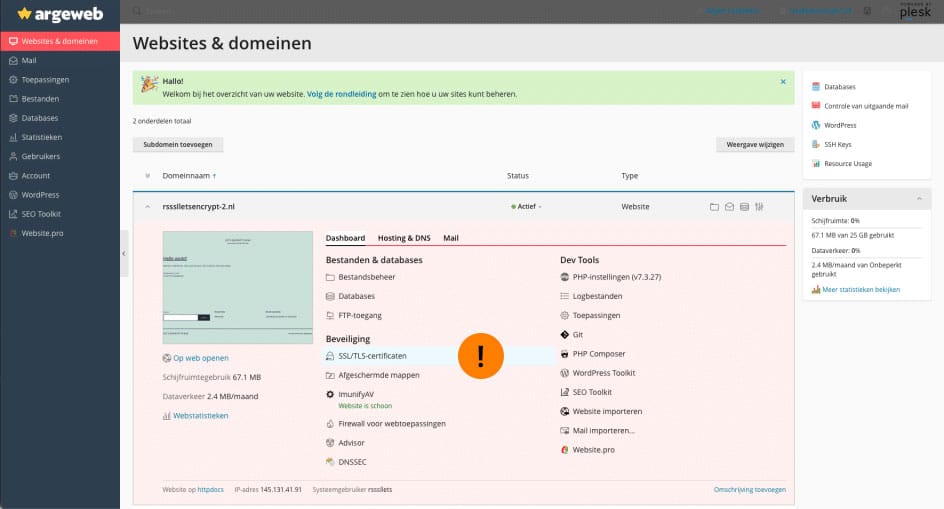
To install an SSL certificate on Plesk, open your Plesk control panel and navigate to the ‘Websites & Domains’ tab in the left sidebar and then click on the ‘SSL/TLS certificates’ link in the ‘Security’ section:
- Once in the SSL/TLS section, click on ‘Advanced Settings’
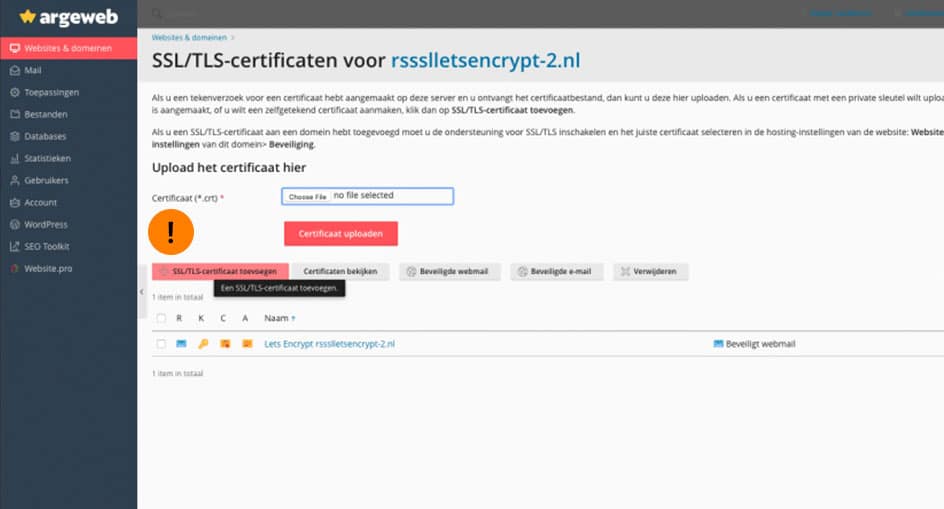
2. Click on ‘add SSL/TLS certificate’:
3. Now you have to create a certificate signing request. In the ‘Certificate name’ field, enter a name for your SSL certificate. This name will show in the SSL certificates overview. You can choose any name you’d like.
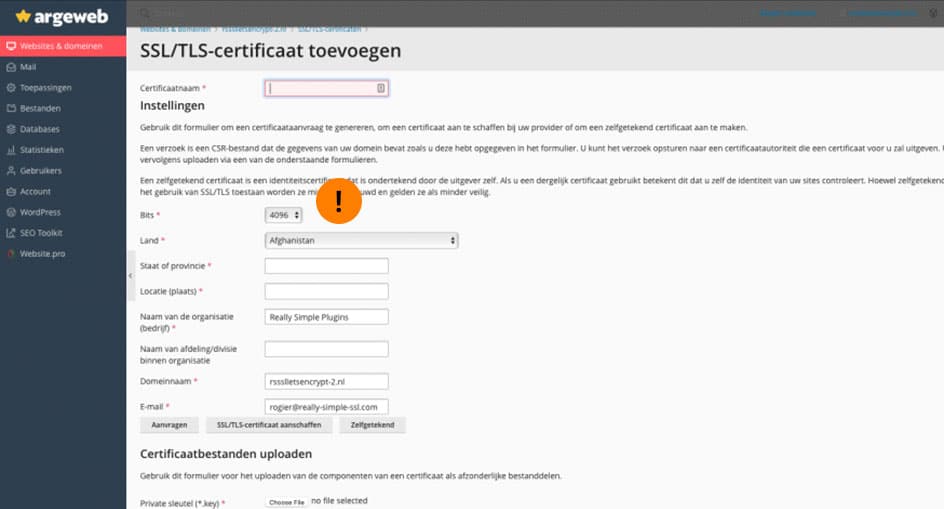
4. Set ‘Bits’ to 4096′ and fill out the rest of the required fields with your information. Finally, upload the CRT, KEY and CABUNDLE files from the Really Simple Security certificate wizard.
Once this step has been completed, your SSL certificate will be activated.
If you have any questions or experience any issues, do not hesitate to send us a message.