If you do development on your own machine, then deploy to production, and you have an SSL certificate on your site, it is useful to have SSL on your localhost environment. This guide will walk you through all the necessary steps to get a working certificate on localhost.
The instructions are based on macOS Sierra 10.12.5, using MAMP (Apache) and Chrome 59.
Install MAMP
The first step is to install MAMP. MAMP is a one-click solution for macOS and Windows for setting up a local development environment. It combines free software such as Apache, NGINX, and MySQL and is the software of choice here at Really Simple Security headquarters.
Generating a self-signed certificate for local use
Since Chrome 58, certificates for use on localhost need to have a SAN, Subject Alternative Name. Getting a certificate with the right properties can be a daunting task, but luckily Alexander Zeitler has written a guide on how to generate a certificate with a Subject Alternative Name. This does involve some messing around with the command line but is not too hard to do. The following steps need to be taken to create a certificate with SAN for localhost:
Generating the certificate
Open up a terminal and type the following:
mkdir ~/ssl/
This will create a directory called ssl in your root folder. We now need to enter that directory by typing:
cd ~/ssl
Next up, create a file named server.csr.cnf by using your text editor of choice, in this case, I’m using vi
vi server.csr.cnf
And copy the following information (for more information about what each field after [dn] does, refer to this guide by Oracle). You can change these attributes to reflect those of your own organization:
[req]
default_bits = 2048
prompt = no
default_md = sha256
distinguished_name = dn
[dn]
C=US
ST=New York
L=Rochester
O=End Point
OU=Testing Domain
emailAddress=your-administrative-address@your-awesome-existing-domain.com
CN = localhost
To save the file, type
:wq
Followed by an enter. This will write and quit the file.
Next up create a file named v3.ext
vi v3.ext
And copy the following content:
authorityKeyIdentifier=keyid,issuer
basicConstraints=CA:FALSE
keyUsage = digitalSignature, nonRepudiation, keyEncipherment, dataEncipherment
subjectAltName = @alt_names
[alt_names]
DNS.1 = localhost
Write and quit again by typing
:wq
You can verify the files are in the directory by typing
ls -la
Which will show all files in the ~/ssl/ directory. Next, paste the following line which will generate a RSA private key:
openssl genrsa -des3 -out ~/ssl/rootCA.key 2048
Next, we will generate the root certificate which will be valid for 1024 days:
openssl req -x509 -new -nodes -key ~/ssl/rootCA.key -sha256 -days 1024 -out ~/ssl/rootCA.pem
Afterwards, we can create the private key for the certificate (server.key):
openssl req -new -sha256 -nodes -out server.csr -newkey rsa:2048 -keyout server.key -config <( cat server.csr.cnf )
And finally we generate the certificate (server.crt):
openssl x509 -req -in server.csr -CA ~/ssl/rootCA.pem -CAkey ~/ssl/rootCA.key -CAcreateserial -out server.crt -days 500 -sha256 -extfile v3.ext
This should be it! You can verify the certificate has the SAN by typing the following in the terminal:
openssl x509 -text -in server.crt -noout
Which should contain this line:
X509v3 Subject Alternative Name:
DNS:localhost
Adding the rootCA.pem to the list of trusted root CA’s
Before the certificate is accepted by your browser, the rootCA.pem needs to be added to the list of trusted root CA’s. You can do this by opening Keychain Access, click on the ‘System’ keychain and select the ‘Certificates’ category. This should return something like this:

To add the rootCA.pem file, click on the plus sign near the bottom-left corner of ‘Keychain Access’. Add the rootCA.pem file and you will see it listed with a red cross, notifying you the certificate is not trusted.

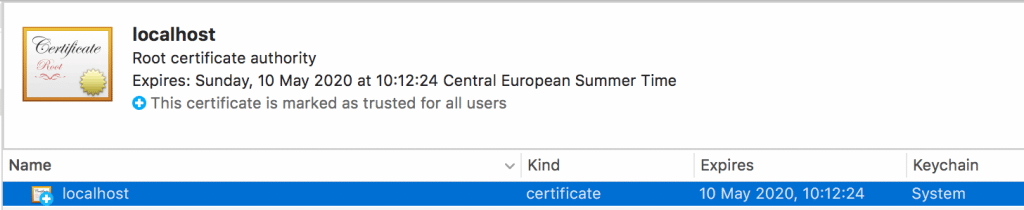
For the certificate to work, we need to make sure the certificate is trusted. To do so, double-click on the ‘localhost’ certificate, expand ‘Trust’ and in the field ‘When using this certificate’ select ‘Always Trust’, like this:

Exit the menu and your certificate should now look like this:
We are now ready to configure Apache!
Configuring Apache for SSL
The Apache configuration files we need to configure for the use of the certificate are httpd.conf located at /../MAMP/apache/conf/httpd.conf and httpd-ssl.conf located at /../MAMP/apache/conf/extra/httpd-ssl.conf.
Make a backup of your current configuration before you continue!
Configuring httpd.conf
First, open the httpd.conf file and uncomment the following lines:
LoadModule ssl_module modules/mod_ssl.so
Include /Applications/MAMP/conf/apache/extra/httpd-ssl.conf
It could be these lines are already uncommented or not present. When they are not present you can add them.
Next set the Servername to localhost:443 (make sure there is only one Servername defined in the file)
Servername localhost:443
These are all changes you need to make in httpd.conf!
Configuring httpd-ssl.conf
Then, in the httpd-ssl.conf file, do the following:
Set Listen to 443
Listen 443
Note: From MAMP 4.4.1 onwards, adding this might not be necessary. If Apache fails to start with the ‘could not bind to address [::]:443′ error, you might have to comment out the ‘Listen 443’ line by placing # in front of it.
Next, find the virtualhost configuration which looks something like this:
<VirtualHost _default_:443>
# General setup for the virtual host
DocumentRoot “/Applications/MAMP/Library/htdocs”
ServerName localhost:443
ServerAdmin [email protected]
ErrorLog “/Applications/MAMP/Library/logs/error_log”
TransferLog “/Applications/MAMP/Library/logs/access_log”# SSL Engine Switch:
# Enable/Disable SSL for this virtual host.
SSLEngine off
A couple of things need to be changed in this configuration. First, the VirtualHost should be set to *:443, instead of _default_:443. Make sure the DocumentRoot is correct. The ServerName should be changed to localhost:443. Finally, the SSLEngine needs to be set to on. The result should look like this:
<VirtualHost *:443>
# General setup for the virtual host
DocumentRoot “/Applications/MAMP/htdocs”
ServerName localhost
ServerAdmin [email protected]
ErrorLog “/Applications/MAMP/Library/logs/error_log”
TransferLog “/Applications/MAMP/Library/logs/access_log”# SSL Engine Switch:
# Enable/Disable SSL for this virtual host.
SSLEngine on
Note: The DocumentRoot might not be necessary anymore from MAMP 4.4.1. onwards. If you see 404 errors on https://localhost but the site works fine on http://localhost, try commenting out the DocumentRoot line (by placing a # in front of it). MAMP might put both DocumentRoots together, resulting in it looking for /Applications/MAMP/htdocs/Applications/MAMP/htdocs, which fails.
Finally, specify the SSLCertificateFile and SSLCertificateKeyFile directives. Add the location of the .crt file you have generated earlier after SSLCertificateFile.
Add the location of the .key file to the SSLCertificateKeyFile directive.
In my case, it looks like this:
SSLCertificateFile “/ssl/server.crt”
SSLCertificateKeyFile “/ssl/server.key”
You can copy the server.crt and server.key file to another directory if you’d like but be sure to define the right path in httpd-ssl.conf.
Visit https://localhost to see if it works:

That’s it! You should now have a local development environment with SSL!
Troubleshooting issues after updating MAMP
After updating MAMP to version 4.4.1. our configuration didn’t work anymore. First we got the following error: could not bind to address [::]:443.
what this means is that apache cannot start because port 443 is already in use. This happens when there are multiple ‘Listen 443’ lines defined. This can be fixed by removing the ‘Listen 443’ line from httpd.conf. Leave the ‘Listen 443’ in httpd-ssl.conf. You can find possible duplicates by running the following command in the Terminal:
grep -r listen /Applications/mamp/conf
This will show all instances of ‘listen’ in the MAMP configuration directory.
Once that error was resolved the SSL certificate was working but all https://localhost requests resulted in a 404 error. This error was happening because the ‘DocumentRoot’ was defined twice, in both httpd.conf and httpd-ssl.conf. Removing the DocumentRoot from the httpd-ssl.conf resolved this issue. Now MAMP is back up and running.
We also experienced that Apache doesn’t write all errors to the apache_error.log file in the /logs/ directory. If that happens, try to restart Apache via the Terminal (command line) using this command:
sudo /Applications/MAMP/Library/bin/apachectl restart
It is possible that restarting Apache in this way will show errors that didn’t make it to the log file, making it a lot easier to troubleshoot issues.