Really Simple Security offers two login protection approaches. Two-Factor Authentication (2FA) requires a second verification step after entering your password, preventing unauthorized access even if your password is compromised.
| Method | Pros | Cons |
|---|---|---|
| Easy setup, no additional apps needed | Vulnerable if email account is compromised | |
| TOTP/Authenticator | More secure, 2FA codes generated on separate device | Requires app installation, risk of losing device access |
Passkey Login replaces passwords entirely with device-based authentication (fingerprint, facial recognition, or security key).
| Method | Pros | Cons |
|---|---|---|
| Passkey | Phishing-resistant, no passwords to remember | Requires compatible device/browser |
Enabling Login Authentication in Really Simple Security
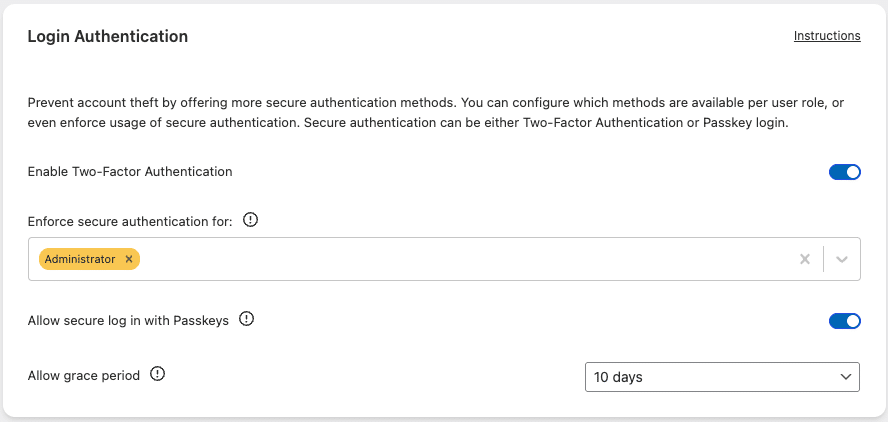
Navigate to Security → Settings → Login Protection → Login Authentication and enable the main “Enable Two-Factor Authentication” setting. You can customize which ‘methods’ are available, and which user roles are eligible:
- Enforce secure authentication for: Select any roles required to use 2FA/Passkey. Roles not listed here can still use it optionally.
- Allow secure log in with Passkeys: Enables passwordless authentication with Passkeys.
- Allow grace period: The amount of days users have to configure their authentication method before being locked out.
Note: Users in enforced roles who don’t configure an authentication method before their grace period expires will be locked out, until an Administrator resets their status.
Configuring Authentication Methods
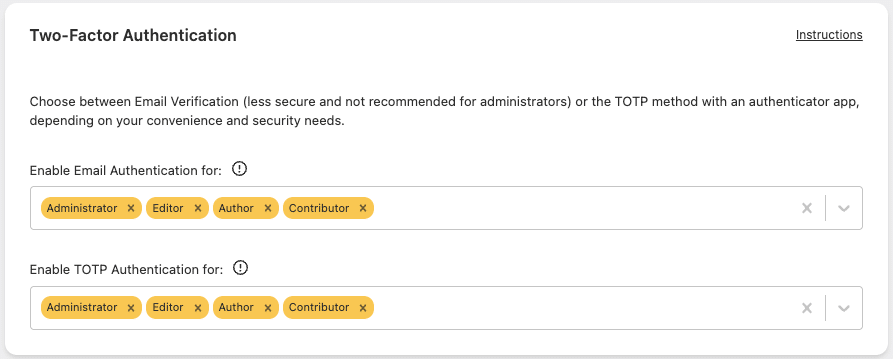
Email Verification / Authenticator App (TOTP):
- Select eligible user roles in “Enable Email Authentication for” and/or “Enable TOTP Authentication for”.
- TOTP is recommended for Administrators as codes are generated on a separate device.
Passkey:
- Enabled via the main “Allow secure log in with Passkeys” toggle, no additional configuration needed.
- Recommended for all roles as the most secure option.
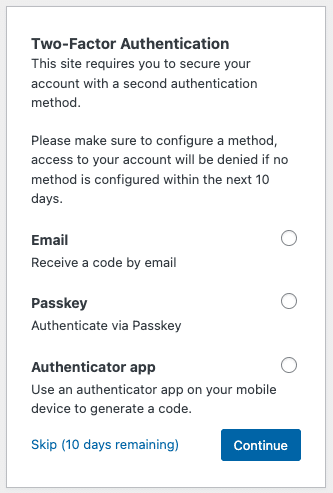
Setting up Login Authentication as a user (Onboarding)
The available methods depend on what’s enabled for each user role. If multiple methods are available, users can select their preferred option at login:
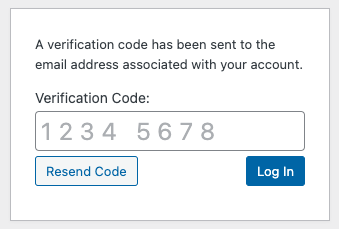
Email Verification
Enter the verification code sent to your email address.
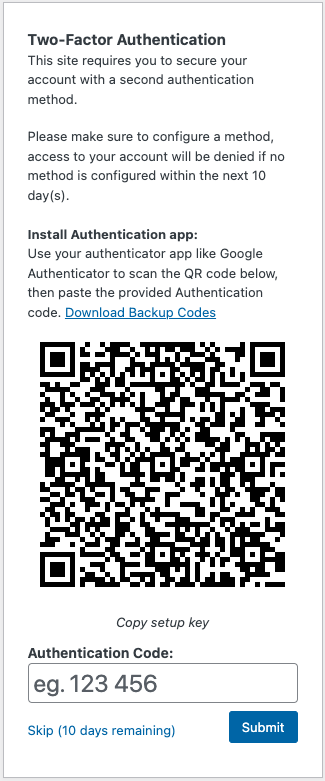
Authenticator App (TOTP)
- Download backup codes via the Download Backup Codes link
- Scan the QR code with your authenticator app (or copy the setup key manually)
- Enter the generated code and click Submit
Passkey
Follow the browser/OS prompt to create a passkey using your device’s authentication (Touch ID, Face ID, security key, etc.).
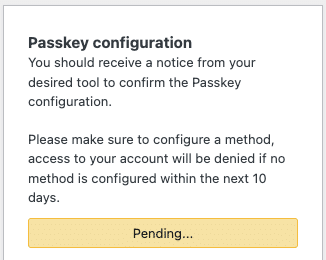
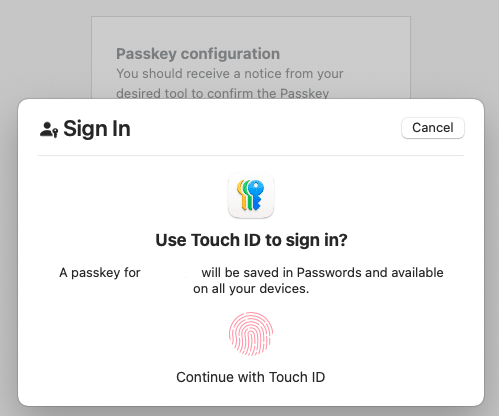
Once configured, the passkey is stored in your device’s password manager for future logins.
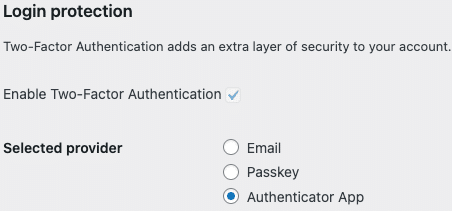
Switching between Login Authentication methods
Go to Users → Profile, scroll to the Login Authentication section, and use “Selected provider” to switch between available methods.
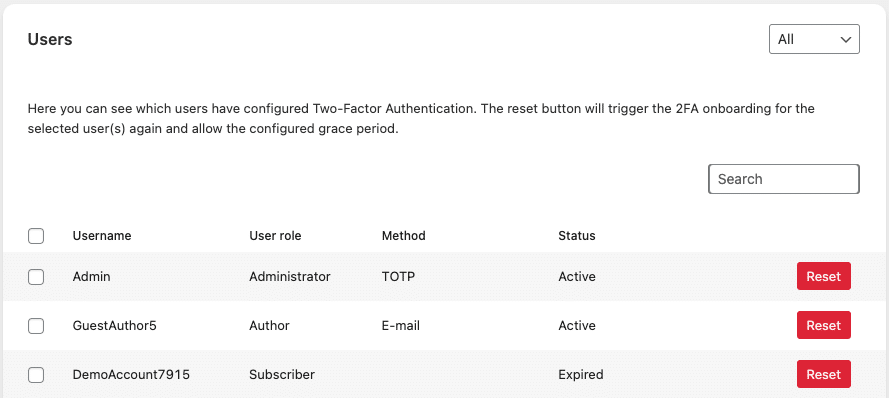
Managing User Status
The Users section shows each user’s authentication status:
| Status | Meaning | Action |
|---|---|---|
| Active | Method configured and working | Reset removes configuration; user reconfigures on next login |
| Open | Awaiting configuration | No action needed |
| Disabled | Optional 2FA, not configured | Reset prompts user to configure |
| Expired | Grace period ended, account locked | Reset unlocks account and restarts grace period |
Troubleshooting: how to regain access if you’re locked out?
If a user is locked out
- Login as Administrator
- Navigate to Settings → Login Protection → Login Authentication → Users
- Click Reset next to the user’s account to restart their 2FA configuration process
If an Administrator is locked out
- Create an empty file named
rsssl-safe-mode.lockin your site’s /wp-content/ folder - This bypasses authentication requirements, allowing you to log in
- Reset your authentication settings by navigating to Settings → Login Protection → Login Authentication → Users → Reset
- Delete the rsssl-safe-mode.lock file to re-enable all protections
