The Firewall module in Really Simple Security is a powerful feature that allows you to monitor and filter requests to your WordPress site. You can activate the firewall by enabling the “Enable Firewall” slider under SSL & Security -> Settings -> Firewall.
This article explains how to configure the firewall rules in Really Simple Security to identify and lock out unwanted, malicious traffic from your WordPress site.
Table of Contents
- 404 Blocking
- Region Blocking
- User Agents
- IP Allowlist & Blocklist
- Event Log
- Troubleshooting: Disabling the Firewall when you are locked out
404 Blocking
Malicious actors may attempt to ‘scan’ your site for vulnerable parts that can be exploited. In the process of determining which parts of the site might be vulnerable, these scans are likely to trigger high numbers of “404 Not Found” errors when they check URLs that do not exist on your site. As such, those scans are expected to trigger more 404 errors than any legitimate user would.
The 404 Blocking firewall rule pro-actively blocks IP addresses if they exceed the acceptable amount of 404 Not Found errors within a certain (customizable) timeframe. The following settings are available for the 404 blocking rule:
Threshold
This setting determines how many times a 404 Not Found error has to be triggered within a certain timeframe for an IP address to get locked out.
- Disabled – Disables the 404 blocking firewall rule
- Lax – 10 errors triggered within 2 seconds
- Normal – 10 errors triggered within 5 seconds
- Strict – 10 errors triggered within 10 seconds
Lockout duration
How long should an IP address be locked out after exceeding the acceptable amount of 404 errors.
- 30 minutes
- 1 hour
- 4 hours
- 1 day
Trigger Captcha on Lockout
The 404 Blocker is an efficient method to stop malicious parties from searching your site for possible exploits. It is highly unusual for legitimate site visitors to trigger many “404 Not Found” errors, let alone within a timeframe of 10 seconds (or less), but there is always a chance of false positives.
If legitimate visitors are being blocked on your site due to the 404 Blocker, this likely indicates a different problem, such as broken links or deleted resources that your site still tries to load. However, if you are concerned about locking out legitimate visitors (who accidentally trigger large amounts of 404 errors), you can allow them to unblock themselves by completing a Captcha.
- Make sure to configure a Captcha method (SSL & Security -> Settings -> General -> Captcha) before enabling this setting.
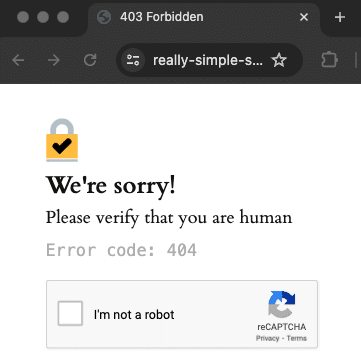
If a visitor is locked out due to exceeding the 404 threshold, they will be presented with the following page. The lockout expires as soon as the user completes the Captcha.
Manage IP Lockouts
If an IP address is blocked due to exceeding the 404 threshold, that IP address will appear in the IP Blocklist under Firewall -> Blocklists.
- Clicking the Reset button next to a blocked IP address removes the lockout, allowing that IP address to connect to the site again

Region Blocking
The Region firewall rule can be used to restrict access to your site from certain geographic locations. Detailed usage & debugging instructions are available here, but we will explain the basics below.
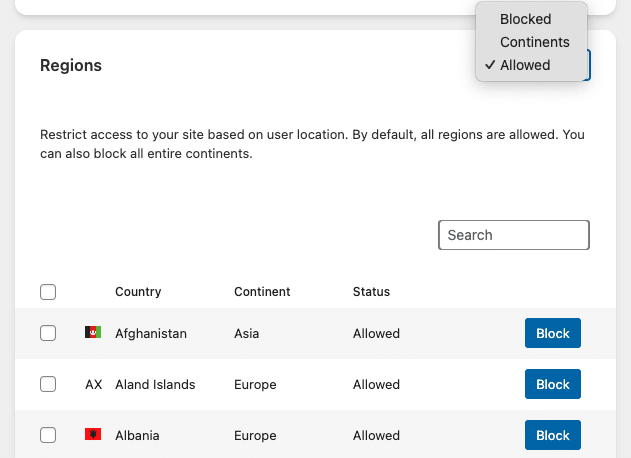
- Use the dropdown menu in the top right corner of the Regions block to filter for countries that are currently Allowed or Blocked, or use the Continents tab to block entire continents.
Allowed
Displays all countries that are allowed to connect to the site. All countries are set to Allowed by default.
- Click “Block” next to a country to prevent that country from accessing the site.
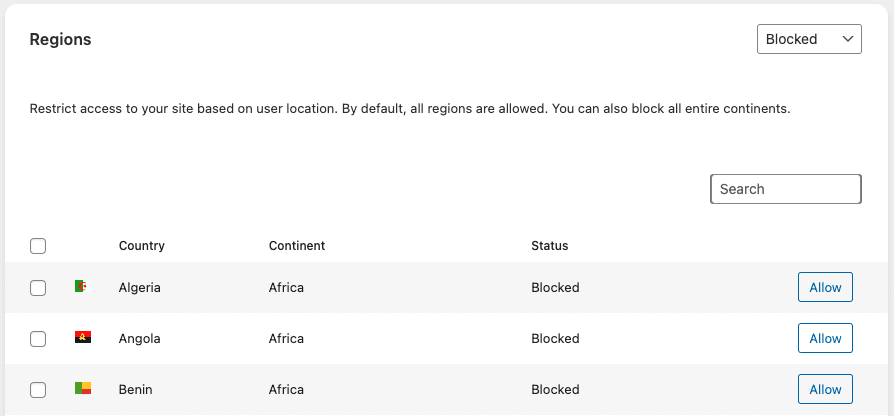
Blocked
Displays all countries that are currently blocked from connecting to the site.
- Click “Allow” next to a country to unblock it, which allows requests from that country to reach the site again
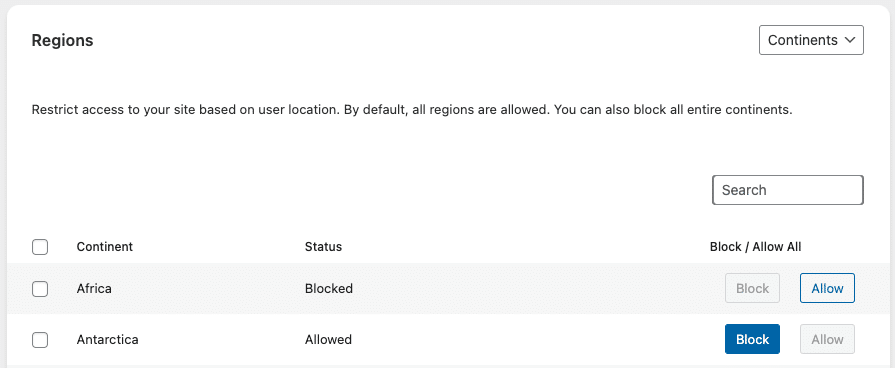
Continents
Displays all continents, and whether users within that continent are allowed to connect to the site.
- Blocking a continent blocks the requests from all of the individual countries within that continent, which can be adjusted on a per-country basis via the “Allowed” tab
User-Agents
Another characteristic of bots and automated scan tools is that they often have unusual “user-agent” strings, which don’t match the user-agent of common web browsers used by legitimate visitors.
Really Simple Security comes with a predefined set of rules to block common malicious user-agents out of the box. The list can be manually expanded upon by the website administrator to include other user-agents that should be blocked.
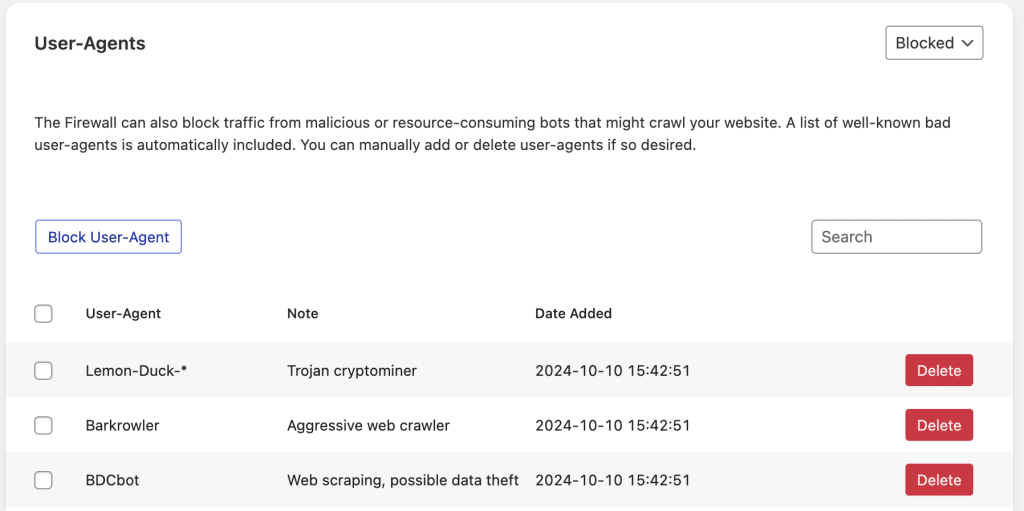
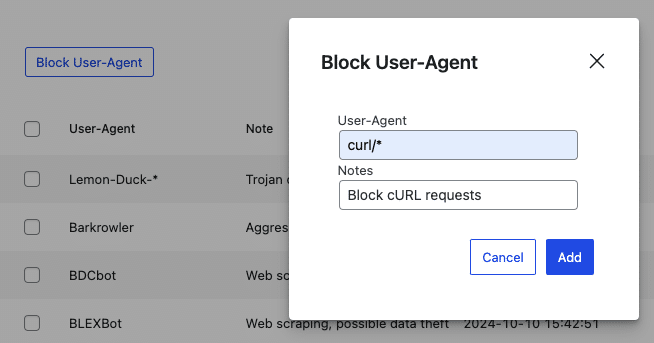
- Click the Block User-Agent button to manually add a user-agent that should be blocked.
The below example defines a rule that blocks requests from any version of the cURL utility.
IP Allowlist & Blocklist
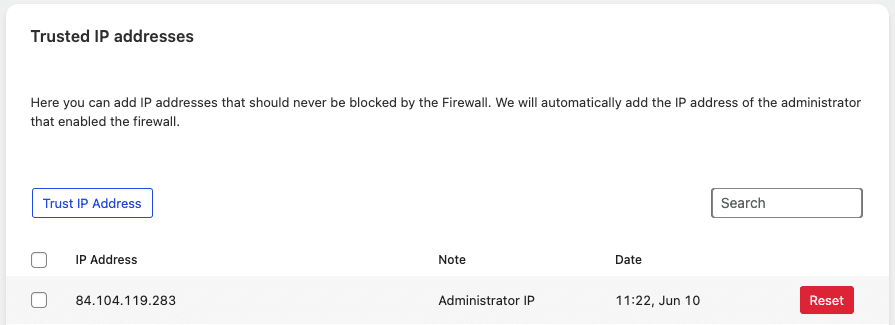
- Add IP addresses that should never be blocked by the firewall in the list of Trusted IP addresses. The IP address of the administrator who enabled the Firewall is automatically included in the trusted list.
- Add IP addresses that should always be blocked by the firewall to the IP Blocklist.
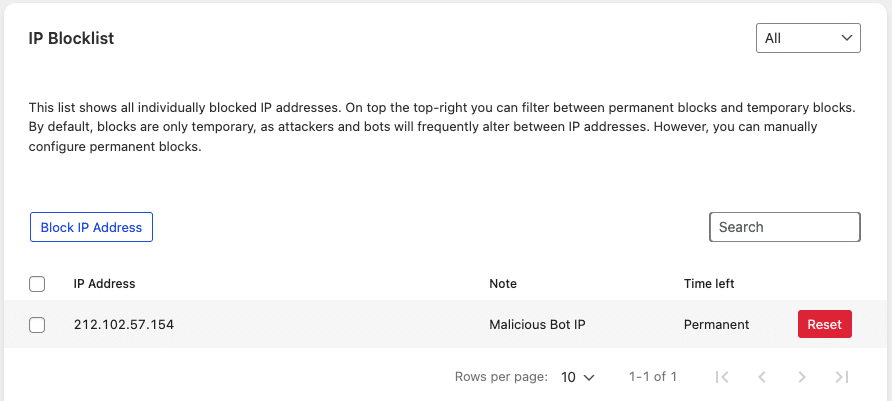
- Click the Reset button next to an IP address in the list, to remove it from the list of ‘trusted’ or ‘blocked’ addresses.
Event Log
The Event Log under Firewall -> Logs contains an overview of all firewall-related activity, allowing you to monitor and identify any suspicious activity.
For instance, IP addresses that are locked out due to exceeding the 404 threshold will be reported in the Event Log. Any administrative actions concerning the Firewall are also reported here, such as blocking a specific country from connecting to the site, or manually including an IP address in the ”Trusted IP list” or “IP Block list”.

Note: We developed the Really Simple Security Firewall as an easy to use and powerful part of any WordPress website’s security. We chose not to implement a full Web Application Firewall (WAF), as our opinion is that such functionality should not be implemented by a WordPress plugin, both for performance and security reasons.
Our recommendation is to use the Really Simple Security Firewall in combination with a cloud firewall such as CloudFlare, for best site performance and security. Please find a detailed explanation here.
Troubleshooting: Disabling the Firewall when you are locked out
It could be that you accidentally locked yourself out, for example: you blocked your own country or exceeded the 404 threshold; while your IP address is not included in the list of Trusted IP addresses.
In such cases, you have the possibility to disable the Firewall in Really Simple Security by creating a file in the /wp-content/ directory of the site.
- Create an empty file in the /wp-content/ folder of your website, call it
rsssl-safe-mode.lock - The Firewall restrictions from Really Simple Security will be disabled as long as the file is present.

After logging in and letting the lock-out expire, or adding your own IP to the allowlist of the Firewall, you can safely remove the rsssl-safe-mode.lock file from the /wp-content/ folder to re-activate the Firewall.

