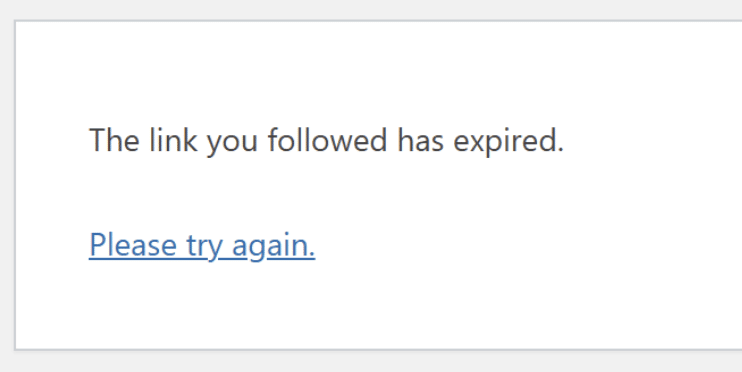
When trying to upload a (large) plugin or theme to your WordPress site, you might run into the message “The link you followed has expired”. This occurs because of the max. upload file size configuration of your WordPress installation, if the file you’re uploading exceeds this limit: this error could appear.
How to find the current upload limit on your WordPress site
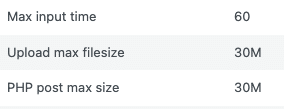
You can view what these limits are currently set to, directly within the WordPress admin interface. This information is located under Tools -> Site Health -> “Info” tab -> Server, where you will find settings such as the Max Input Time, Upload Max Filesize, and PHP Post Max Size. These values determine the maximum file size and execution time allowed for uploads on your server.
If these options are set to lower values than the size of the plugin that you’re trying to upload, this is most-likely what’s causing the “The link you followed has expired” error. There are two approaches you can take to solve this issue:
Solution 1: Uploading the plugin in an alternative way (FTP / cPanel File Manager)
Instead of uploading your new plugin via WordPress, you can upload the plugin via FTP, or a File Manager tool in your webhosting control panel (e.g., cPanel) to bypass the file size restriction. Once you’ve done so, you can activate the plugin under Plugins -> Installed Plugins on WordPress.
- Manually “unzip” the plugin’s .zip file (really-simple-ssl-pro.zip) on your own computer, this results in a folder called
really-simple-ssl-pro - Upload this folder to the
/wp-content/plugins/directory on your webserver - Activate the plugin on WordPress (Plugins -> Installed Plugins)
Solution 2: Increase the maximum file size upload limits
If you prefer to use WordPress’s built-in plugin installer, you can modify your server configuration to increase the maximum upload file size limit. By increasing these limits, you can upload larger plugins and themes packages directly through the WordPress interface.
The available options to adjust these settings depend on your hosting environment, the following methods detail how to do this in the php.ini, .htaccess, and wp-config.php files.
php.ini
- Navigate to the
php.inifile, usually located in the root directory of your WordPress installation. If the does not exist at this location, you can create it manually. - Edit the file in a text editor and add or modify the following lines:
upload_max_filesize = 64M

post_max_size = 64M

max_execution_time = 300
.htaccess (Apache servers)
On Apache servers, you can use the .htaccess file to override PHP settings.
- Locate the
.htaccessfile in the root directory of your WordPress installation - Open the file in a text editor and add the following lines:
php_value upload_max_filesize 64M

php_value post_max_size 64M

php_value max_execution_time 300
wp-config.php
- Navigate to the
wp-config.phpfile, located in the root directory of your WordPress installation - Open the file in a text editor
- Add the following lines to the file (above the line
/* That's all, stop editing! Happy blogging. */):
@ini_set('upload_max_filesize', '64M');

@ini_set('post_max_size', '64M');

@ini_set('max_execution_time', '300');
Note: we recommend starting out with lower values (e.g., 64M for `upload_max_filesize`) and gradually increasing them as needed.