Protecting site visitors with Security Headers

Each time you visit a website, information is exchanged between your device and the website’s server. HTTP headers play an important role in this communication, as they provide extra information about the data that is being shared.

Security Headers are types of HTTP headers that are specifically designed to improve web application security. They instruct web browsers on how to handle a site’s content, to protect website visitors against common types of malicious attacks.

Protecting your website visitors from malicious attacks should be your top priority, and configuring the Security Headers as recommended by Really Simple Security is an easy way to shield your website visitors against common threats like clickjacking and cross-site scripting.

This article walks you through the Security Headers that are essential for your WordPress site. We’ll explain what each one does, and how they help to keep your visitors safe.

HTTP Strict Transport Security (HSTS) & HSTS Preload

1

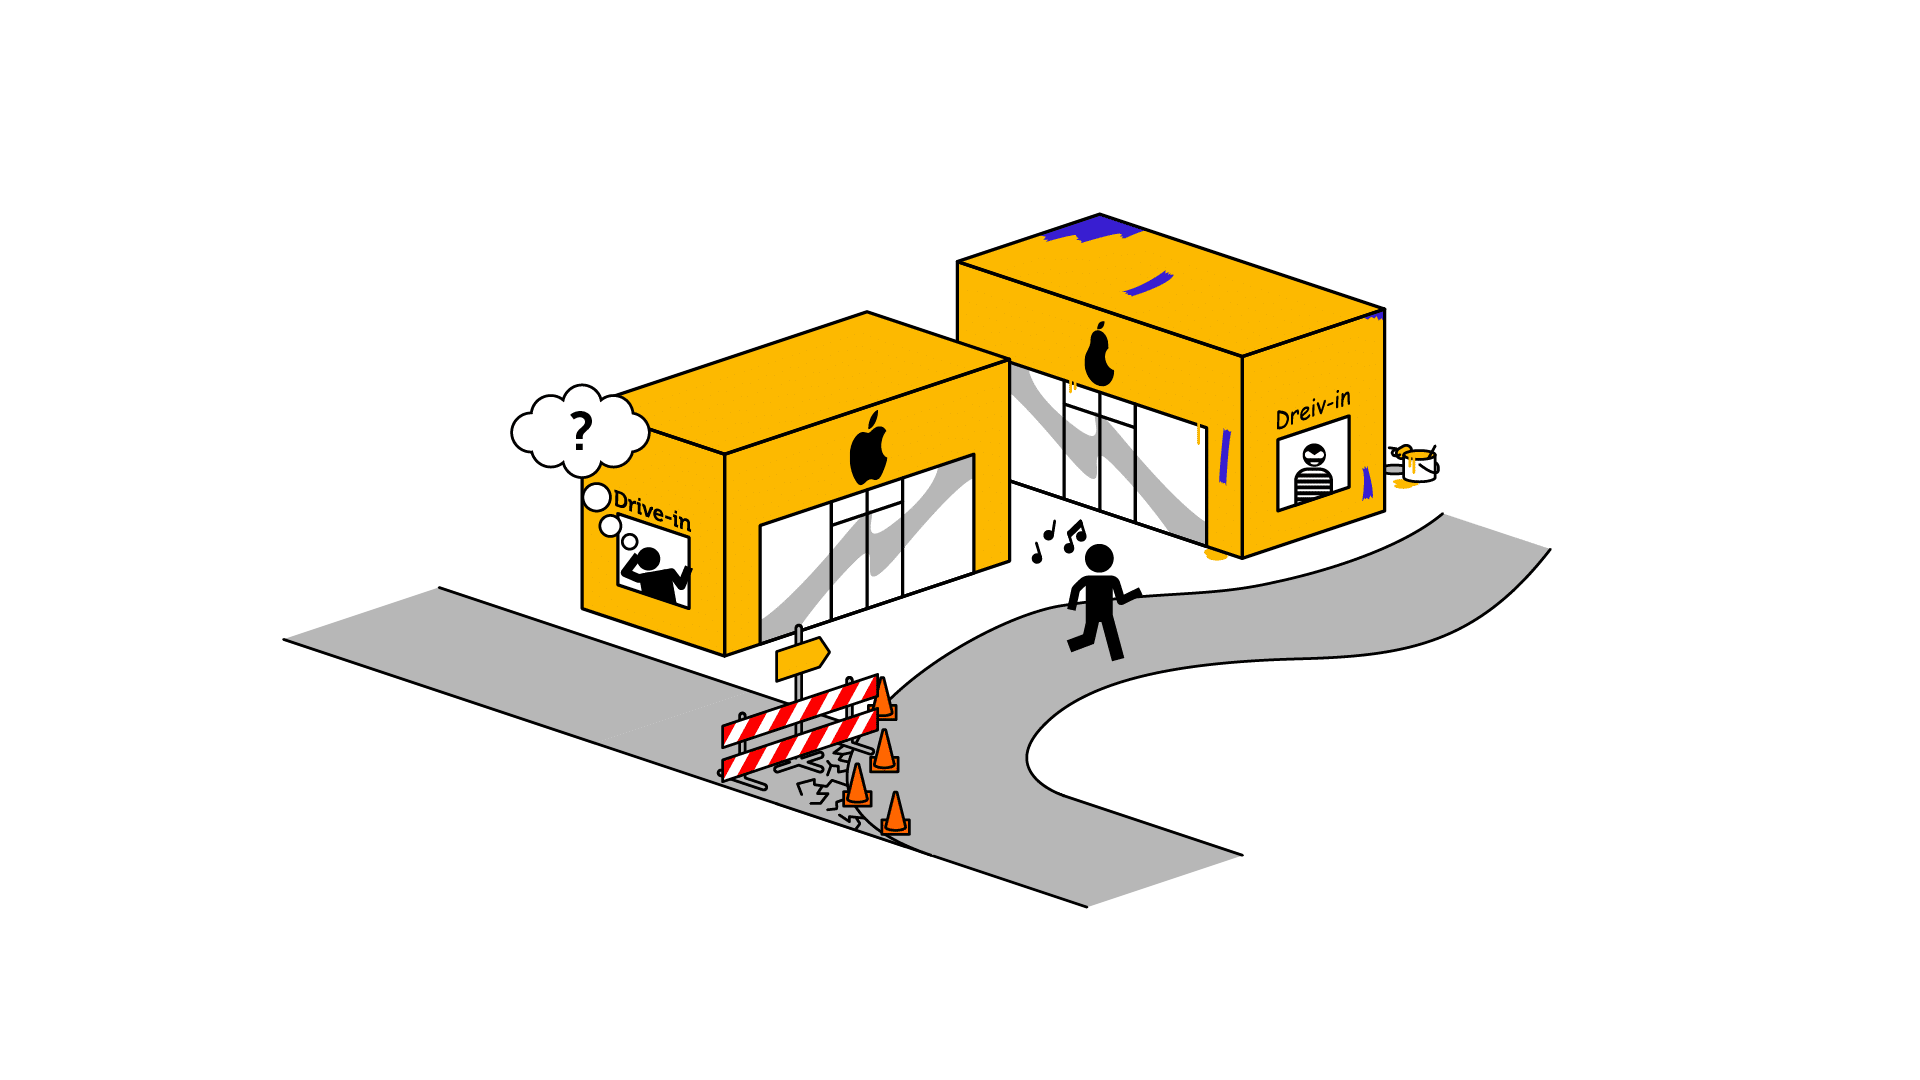
A website visitor is hijacked trying to access your website.

2

The hacker serves a look-a-like website with the purpose to steal e.g. personal data.

The HTTP Strict Transport Security (HSTS) header tells browsers to only connect to the site over encrypted HTTPS connections, instead of loading the site using insecure HTTP. It converts all attempts to access the site using HTTP to the secure HTTPS protocol, to ensure that your SSL certificate is always in use, even when users or attackers attempt to access your site via HTTP,

Consider a case where a hacker redirects a user to a fake version of your site. Even when redirected to the attacker’s fake site, your browser remembers that it has to use SSL due to the HSTS header; and it requests the secure site. As your SSL certificate doesn’t exist on the hacker’s fake site, the browser detects a mismatch and the connection is prevented.

HSTS Preload

When using the HSTS header, we also recommend submitting your domain to the HSTSPreload list, which ensures that browsers know that your site “HTTPS only” by default. This prevents the possibility of a man-in-the-middle (MITM) attack when the site is visited for the first time.

Frame Ancestors (X-Frame-Options)

1

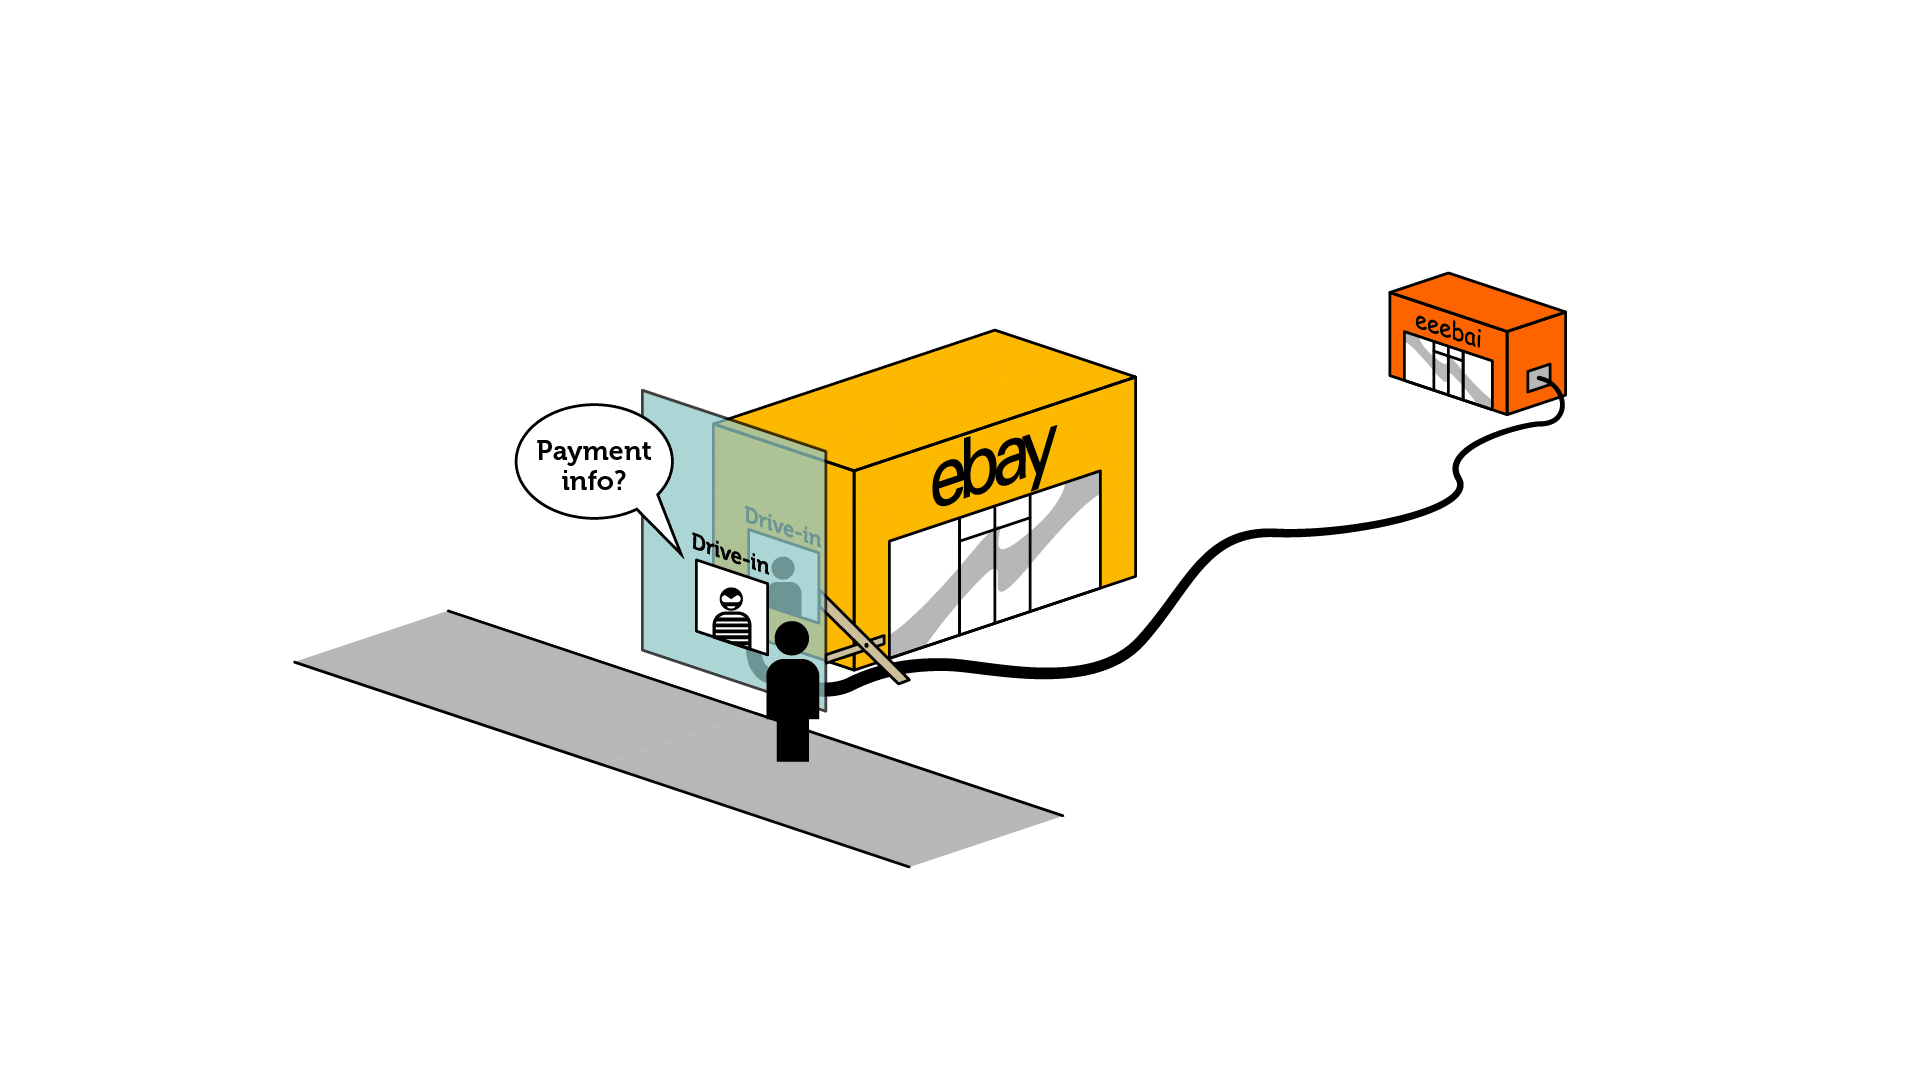
The website visitor expects to enter their payment information or personal data on website A, which seems secure.

2

Website B, controlled by a malicious party, loads an 'invisible' iFrame/Layer in the website to pose as the correct form to enter.

Embedding mechanisms such as <iframe> or <object> are very useful to embed content from external websites on your own site. However, they can also be misused by malicious actors to trick visitors into thinking that they are visiting your website; while they are actually visiting a fake site pretending to be your site.

So, even if you don’t embed any content in an <iframe> on your own site, you would still have to restrict which sites can embed your website.

The Frame Ancestors header allows you to control if your site can be embedded by other sites (and which domains are allowed to do so), which greatly helps to prevent “clickjacking” attacks, whereby your visitors accidentally log in to a fake website pretending to be yours. 

Frame Ancestors supersedes the X-Frame-Options header that was previously used for this purpose, and it allows for more granular control over the domains that are allowed to embed your site’s content. Really Simple Security synchronizes your settings for these two headers and activates them both on your site, until the X-Frame-Options header is ultimately deprecated in modern browsers.

X-Content-Type-Options

2

The website visitor expects to view an image file, but is downloading a script (Bomb) file.

1

The server does not define the scripts that are allowed for the browser to render a website.

The X-Content-Type-Options header tells browsers not to guess (“sniff”) the MIME type of a resource. Instead, it requires the browser to use the MIME type declared by the server. 

A MIME type tells the web browser what kind of file it’s dealing with, and how the browser should handle it. If a malicious file is interpreted incorrectly by the browser, this could be a security risk.

This header prevents attackers from exploiting MIME type mismatches to execute malicious content. It’s especially useful when your site allows user-uploaded content, as it helps ensure that files are treated according to their declared type, greatly reducing the risk of malicious files being executed in an unexpected way.

Content Security Policy

2

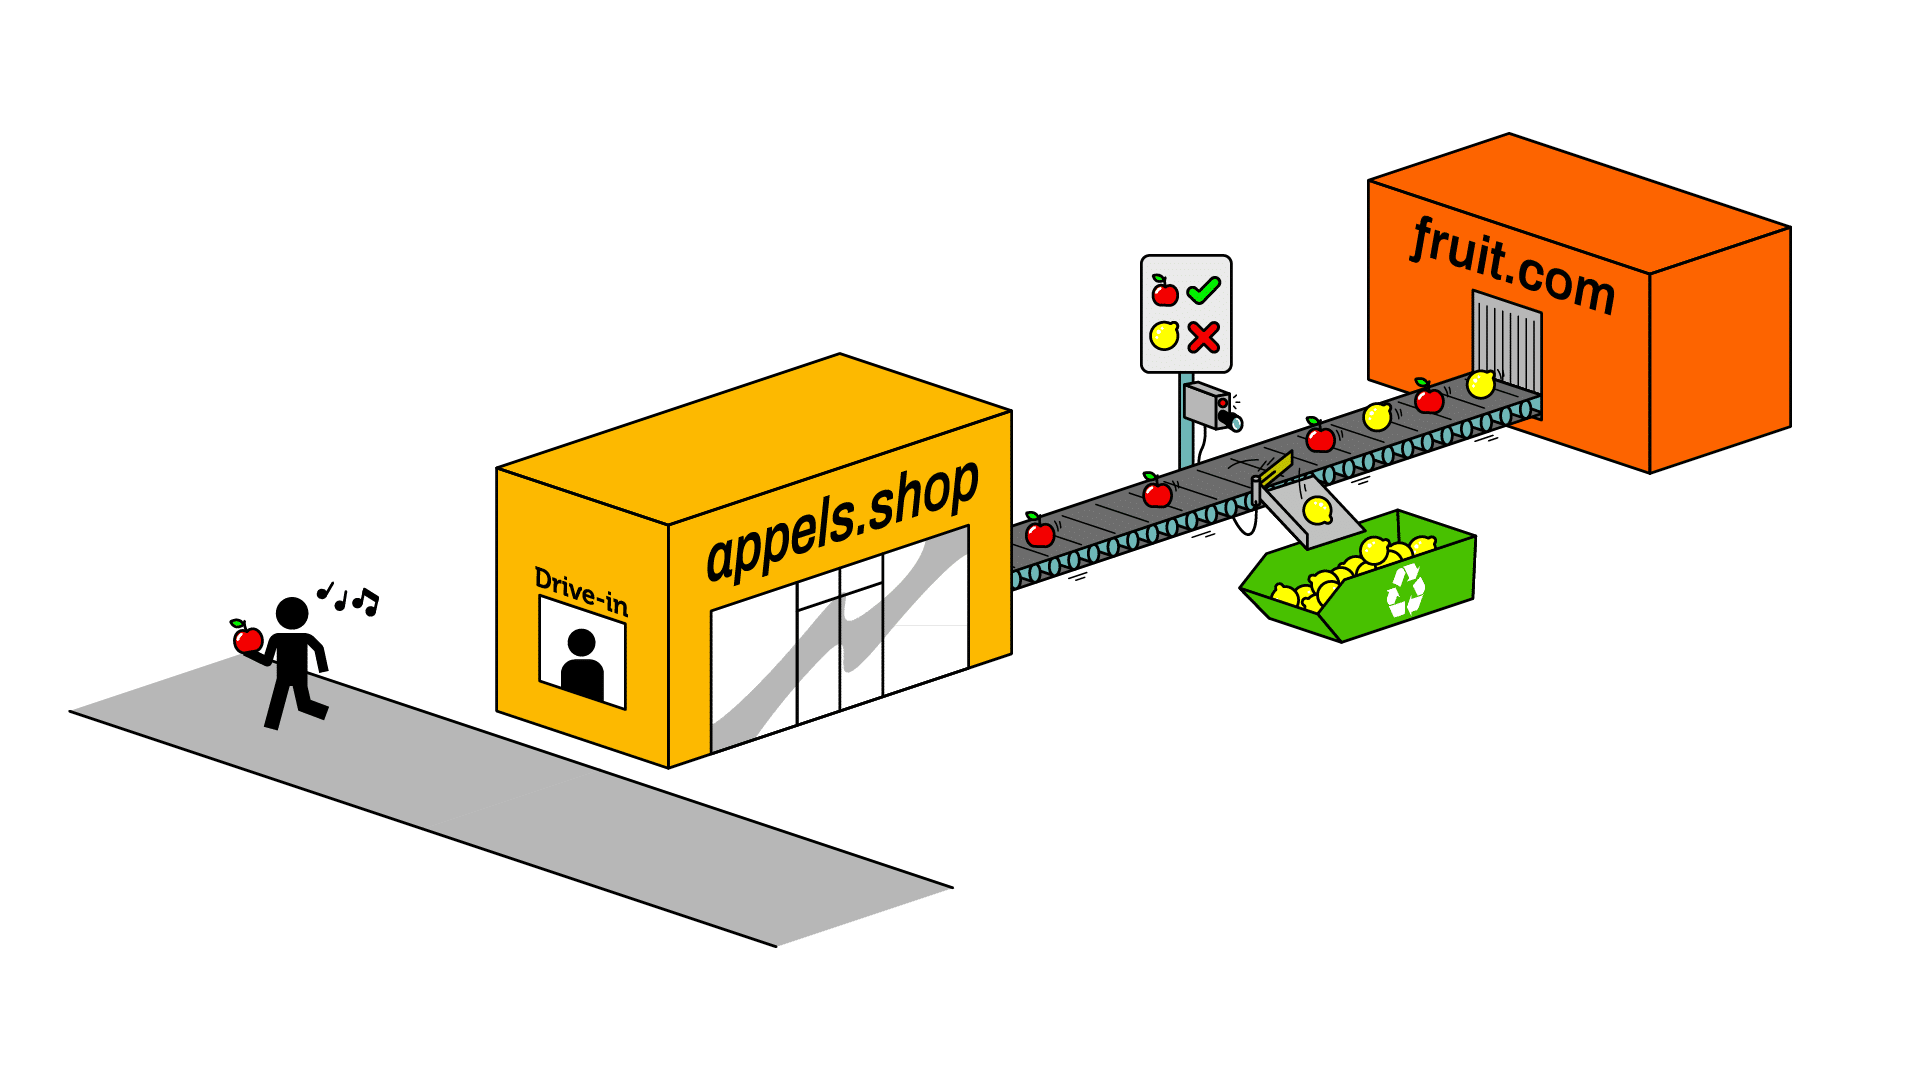
Visitors are safeguarded as they can only interact with trusted, owner-approved content

1

The CSP acts as a filter to ensure that only safe, pre-approved resources & assets can be loaded on the website.

The Content Security Policy (CSP) is a powerful browser-based security mechanism that allows a website administrator to determine which resources (e.g., scripts, stylesheets, images and fonts) can be loaded by the browser.

Administrators can specify source domains where the browser can load resources from, to effectively prevent malicious code execution from unauthorized domains. This measure significantly reduces the risk of cross-site scripting attacks, as it restricts the browser’s ability to execute scripts and other resources from unknown sources/domains.

However, due to the complex nature of the Content Security Policy header, it can be quite challenging to configure this header manually. Besides, not every website uses the exact same resources, so you would have to manually create a tailored policy for each new website. 

Really Simple Security greatly simplifies this process with a ‘Learning Mode’ for the Content Security Policy. During the Learning Mode phase, the CSP does not block any resources yet, but simply reports any violations back to the plugin. These reports are used to tailor the CSP to your site’s specific needs, based on the actual resources that are used on that site.

When Learning Mode has completed (after ~1 week), you can switch to “Enforce” mode. At this point, your CSP includes all of the resources that are used on your site. This automated approach saves time and greatly reduces the risk of errors compared to manual configuration.

Referrer Policy

1

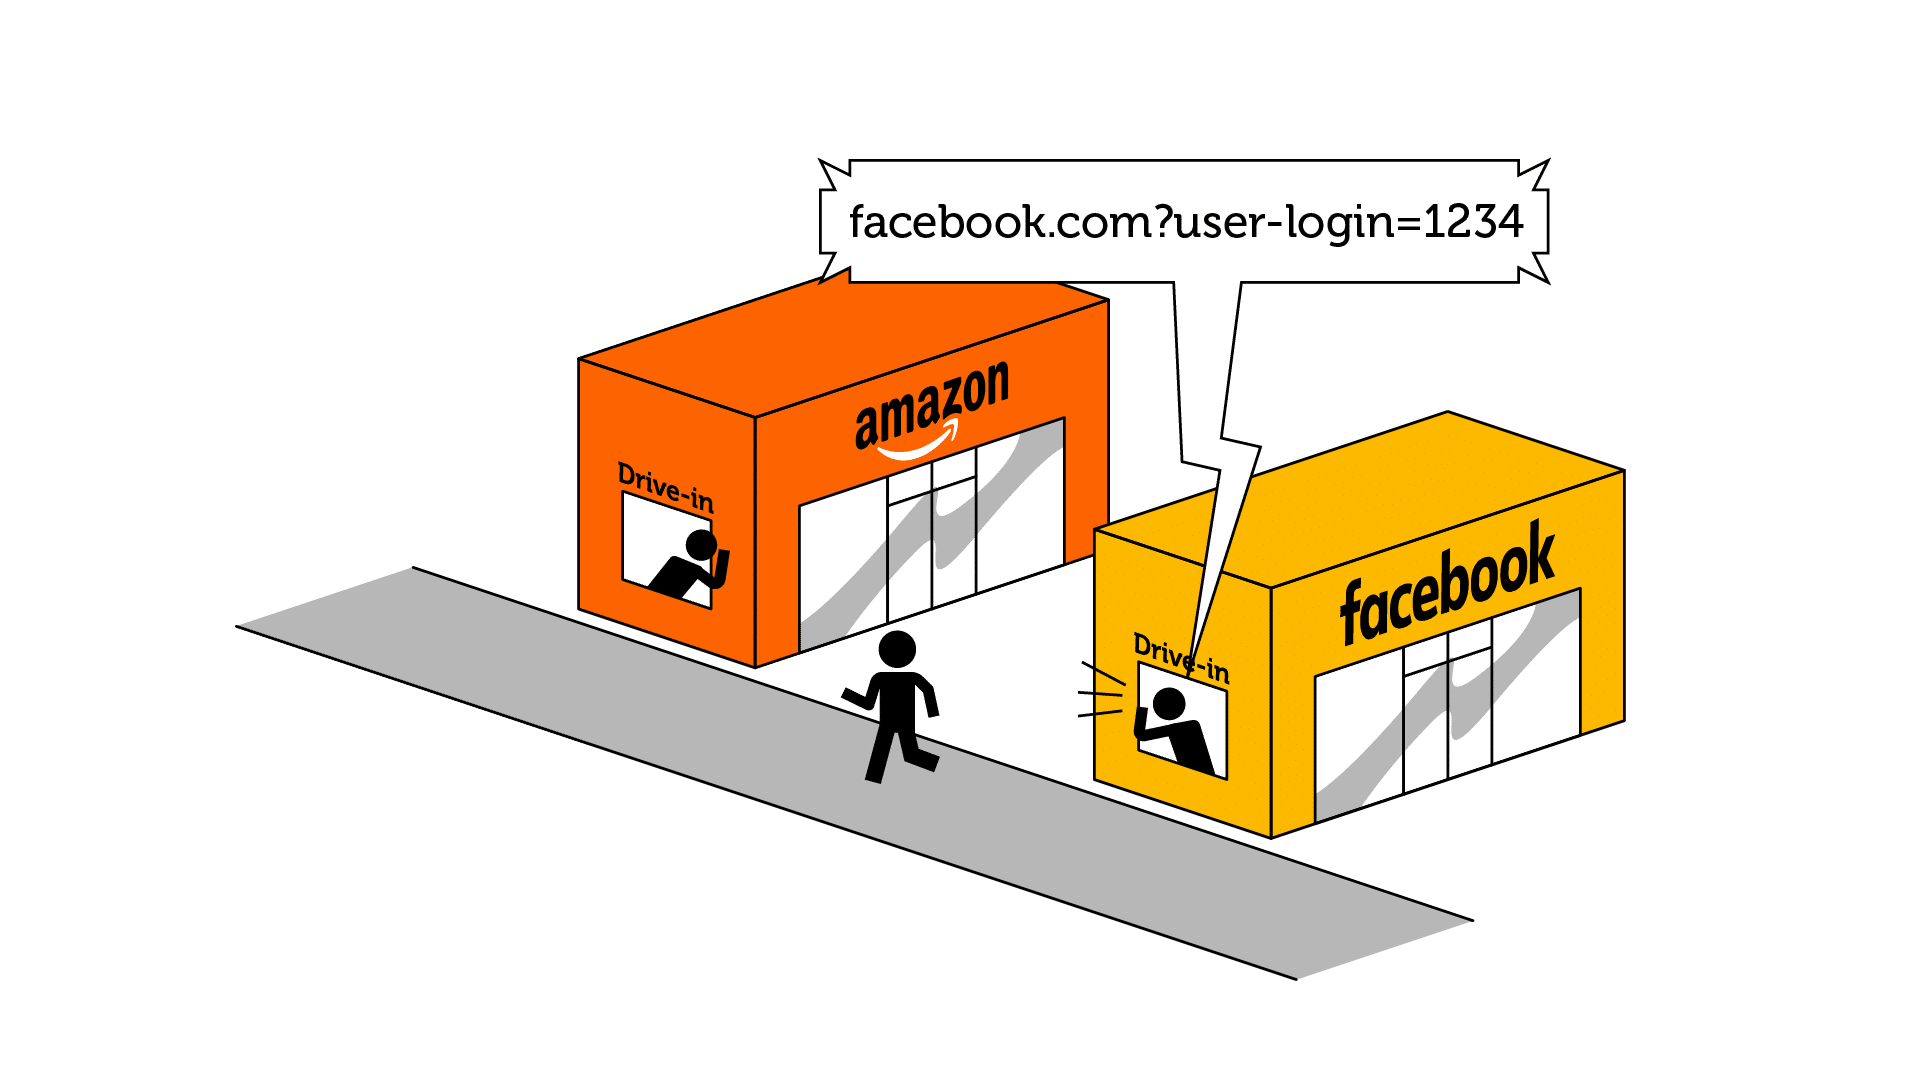
You're logged in to Facebook, and in the URL your login credentials are present. You stumble upon an advert from Amazon and you click it!

2

You visit the Amazon product page, and an Amazon marketeer finds your credentials in their Analytics tool. 

When a user navigates from one web page to another, the browser sends information about the origin page (referrer) to the destination page. This is useful for analytics and tracking user journeys, but it also comes with security & privacy concerns.

URLs can sometimes contain sensitive data like session IDs, personal information (or even login credentials), and without a proper Referrer Policy in place, this information could be leaked to third-party sites. The Referrer Policy header can be used to specify exactly how much referrer information should be included when a user navigates away from your site.  

Options range from sending no referrer information at all, to sending full URLs for same-origin browsing. This helps to prevent leakage of sensitive URL parameters to third-party analytics tools, and exposure of user session information or personal data.

A well-configured Referrer Policy enhances user privacy and security, while still allowing you to benefit from legitimate uses of referrer data.

Permissions Policy

2

Restrict which browser features and APIs can be used, preventing unintended access to sensitive data or hardware like cameras and sensors.

1

You visit a webshop to browse the latest sneakers. Suddenly, your webcam turns on. What's happening?

The Permissions Policy header allows you to explicitly control which browser features and APIs can be used on the site.

Modern web browsers come equipped with a variety of powerful features, ranging from accessing device hardware to the use of other APIs. As many websites only use a small subset of browser features; it is recommended to restrict the available features to the ones that your website actually requires.

Configuring a Permissions Policy that specifically allows the use of features that your website actually uses, helps prevent unintended feature usage through third-party content and reduces the potential attack surface of your environment.

Cross Origin Isolation

2

During the visit, and during the payment, Google's API request is blocked and no data is shared, 'isolating' your website.

1

A PayPal pop-up shows up on top of the Amazon website, used to collect payment information and process the order.

The Cross-Origin Isolation headers allow you to control how information is shared between different sources; such as webservers, processes, or different documents in a web browser. 

  • Cross-Origin Resource Policy (CORP): controls whether your site can be loaded by other websites.
  • Cross-Origin Embedder Policy (COEP): manages how your site loads resources from other origins.
  • Cross-Origin Opener Policy (COOP): determines how your site’s windows can interact with windows from other origins.

While these headers offer an important layer of protection, the implementation can be complex as the appropriate settings depend on your site’s interactions with other resources, such as:

  • Whether your site is used as a resource by other websites.
  • Your site’s use of popups and data transfer across windows.
  • Your site’s reliance on third-party resources.

To implement these advanced headers on your site, we recommend following the instructions listed in this article to determine which settings to use.

Simple and Performant Security.
Easily improve site security with WordPress Hardening, Two-Factor Authentication (2FA), Login Protection, Vulnerability Detection and SSL certificate generation.